


Popular Reviews
3 Best Cordless Vacuum Cleaners
LEARN MORE 3 Best Microwaves to Buy Online
LEARN MORE 4 Best Video Doorbells
LEARN MORE The Best Clothes Steamers
LEARN MORE 4 Best Bathroom Scales
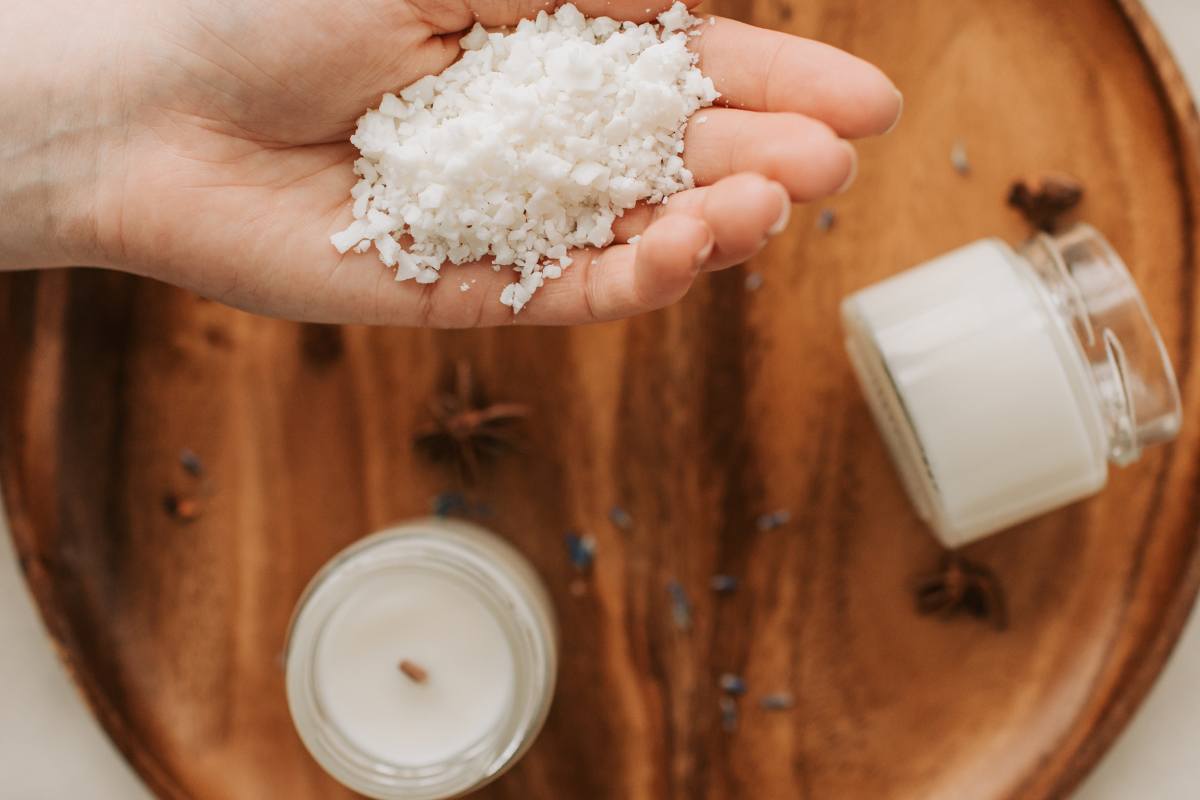
LEARN MORECan You Use Candle Wax in a Wax Warmer?
Absolutely. You can reuse leftover candle wax in a wax warmer. I often use leftover candle wax in my Christmas wax warmer to release its fragrance from a nearly finished candle or a chunk from a larger one. This ensures that no wax goes to waste and provides an eco-friendly way to enjoy your favorite scents. However, it’s crucial to ensure the wax is free from any wick or debris and fits comfortably in the warmer without overflowing.
Wax Melts vs. Candle Wax
While wax melts and regular candle wax share similarities, they …
UV Water Filter for Home Use
It depends on the source of the water you are treating as to whether it’s worth getting a UV filter or not. It probably isn’t necessary if you’re looking to purify your tap water—especially in a first-world country such as the US, where drinking water is already pre-treated. However, installing a UV water filter is strongly recommended if you collect water from a lake, well, or another private source.
What Is a UV Water Filter?
A UV water filter is typically used in tandem with another water filtration method, such as a carbon filter or a reverse osmosis system. It uses ultraviolet light to kill microbes like …

How to Design a Room Using Dormers?
No matter how big homes might be, they always seem to shrink smaller in size as your family gets larger. One of the best ways to enlarge the size of your home is to make your attic a livable space.
Because of the proximity of your attic to the roof, there will be little allowance for light and headroom. This is where dormers step in. They are additions that boost your attic space and enhance natural light coming in.
Using dormers to design your attic room may not be all that simple. The purpose of this article will help you get a …

Easy but Super Stylish Ways to Do Woodwork
Simplicity indeed goes a long way. The same thing can be said with woodwork specifically walls. Having great walls is great, but you do not need to go all out to make them look amazing.
Regardless if you want attention-grabbing entranceways by redecorating the theme or giving your kitchen cupboards a makeover, you can use water-based paint to do it fast but stylishly. Here are some simple but chic tips to make your woodwork from drab to fantastic instantly.
Redecorate Fire Surrounds
A mantelpiece is a great …

Fun Ideas to Paint Your Kitchen Cabinets Within a Budget
Reorganizing your kitchen can be stressful and expensive. Therefore, if you are still satisfied with the design and your cabinets look great, you should just consider painting them. If you can paint them yourself, you can use the money you save to get some new worktops or cabinet handles.
Probably the best explainer video on YouTube about how to paint kitchen cabinets:
https://www.youtube.com/watch?v=6R9HKvGxbR0
Where to Start Painting Kitchen Cabinets
Many experts recommend taking off the doors by unclipping at the hinges. If you paint horizontally, …

Ways to Have Fun with Fairy Lights in Your Home and Bedroom
String lights or fairy lights are not only used as Christmas decorations. When you get creative with them, you can see beautiful lights without your space looking too childish or festive. The fairy light decoration ideas you will see here are great for any room in your home. Therefore, you will have the inspiration to design your bedroom, children’s bedrooms, living rooms, hallways, and kitchens.
Fake Fire
…
