
15 Wood Wall Design Ideas for a Warm, Stylish Home
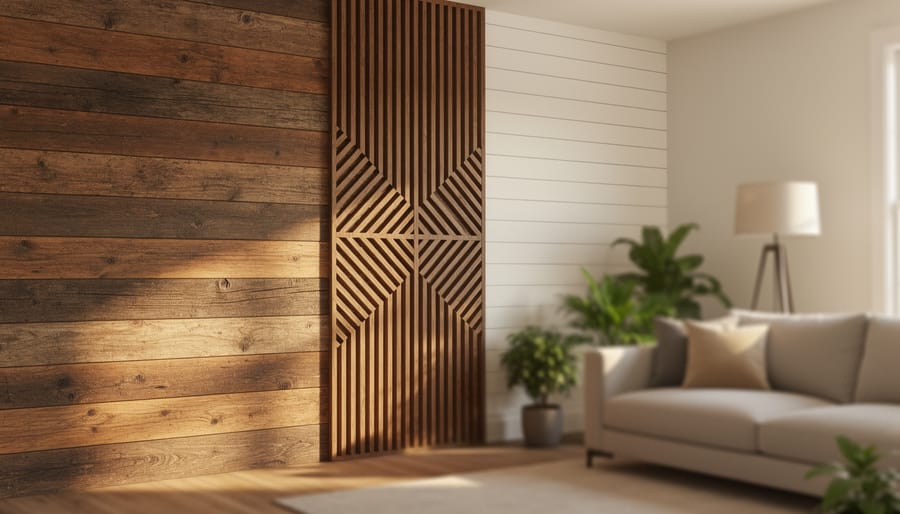
Wood wall treatments transform ordinary rooms into statement spaces, and in 2026 you have more options than ever before: reclaimed barnwood accent walls bring rustic warmth, geometric slat installations create modern dimension, and painted shiplap delivers farmhouse charm without the price tag of solid hardwood. Whether you’re working with a $200 peel-and-stick budget or planning a custom millwork investment, the right wood wall design balances visual impact with practical considerations like moisture resistance, installation complexity, and long-term durability.
The search for wood wall inspiration often starts with a Pinterest board and ends in decision paralysis. Too many choices, conflicting advice about real versus engineered wood, and uncertainty about what actually works in your space can stall even the most enthusiastic project. This guide cuts through the noise with 15 achievable designs spanning traditional paneling, contemporary three-dimensional treatments, and budget-friendly alternatives that deliver the textured, organic feel of wood without professional installation.
Selecting the right treatment depends on three factors: your room’s function (kitchens and bathrooms need sealed or naturally rot-resistant species), your existing architecture (modern spaces can handle bold linear patterns; traditional homes often suit classic wainscoting), and your skill level (some options require only adhesive and a level, while others demand miter saws and finish carpentry experience). The designs ahead range from weekend DIY projects to contractor-led installations, each evaluated for style versatility, maintenance requirements, and cost-per-square-foot so you can move confidently from inspiration to installation.
How We Selected These Wood Wall Designs
We evaluated these fifteen wood wall designs using five practical benchmarks to ensure each option delivers real value for homeowners. First, we assessed versatility across budgets, from affordable pallet wood projects to premium live-edge installations, so readers at any price point find workable choices. Aesthetic appeal mattered equally: we included designs spanning rustic farmhouse to sleek contemporary, ensuring coverage of both enduring classics and what’s resonating in 2026 interiors.
Installation complexity received careful attention because not every homeowner wants to hire contractors. We noted which designs suit confident DIYers and which demand professional expertise. Durability weighed heavily, too, wood treatments perform differently in moisture-prone rooms versus dry living spaces, and we flagged those distinctions. Finally, we verified current material availability and design standards, confirming that recommended wood species, finishes, and installation methods align with what’s accessible and code-compliant now. This fact-checking grounds our recommendations in reality rather than outdated or aspirational advice.
1. Reclaimed Barn Wood Accent Walls
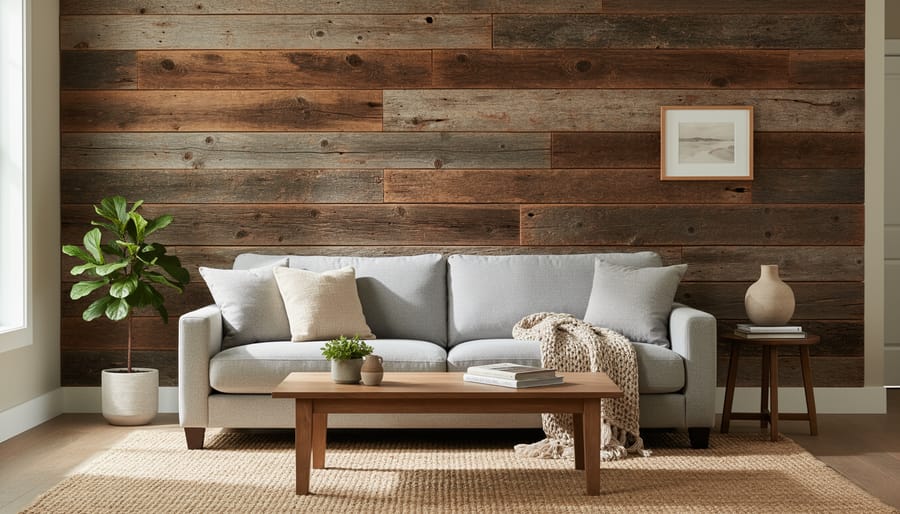
Reclaimed barn wood brings decades of character directly to your walls. The weathered patina, nail holes, and natural variations in color, ranging from silvered gray to warm honey tones, tell a story that new lumber can’t replicate. Each plank carries the marks of time: sun exposure, rain patterns, and the unique grain movement that comes with age.
Sourcing is your first challenge. Architectural salvage yards and specialized reclaimed wood suppliers offer certified barn wood, often from dismantled structures in rural areas. Expect to pay $5, $12 per square foot for quality material, though prices vary based on condition and species. Verify the wood has been kiln-dried and pest-treated before installation.
Installation requires backing boards or furring strips attached to studs, since barn wood often arrives in irregular thicknesses. A skilled DIYer can manage this project over a weekend, but the irregular sizing demands patience and careful planning.
This treatment shines in living rooms, bedrooms, and dining areas where rustic warmth enhances the atmosphere. Pair it with modern furnishings to prevent the space from feeling too country-themed. The textured surface also helps absorb sound, adding subtle acoustic benefits to open-plan spaces.
2. Horizontal Shiplap Paneling
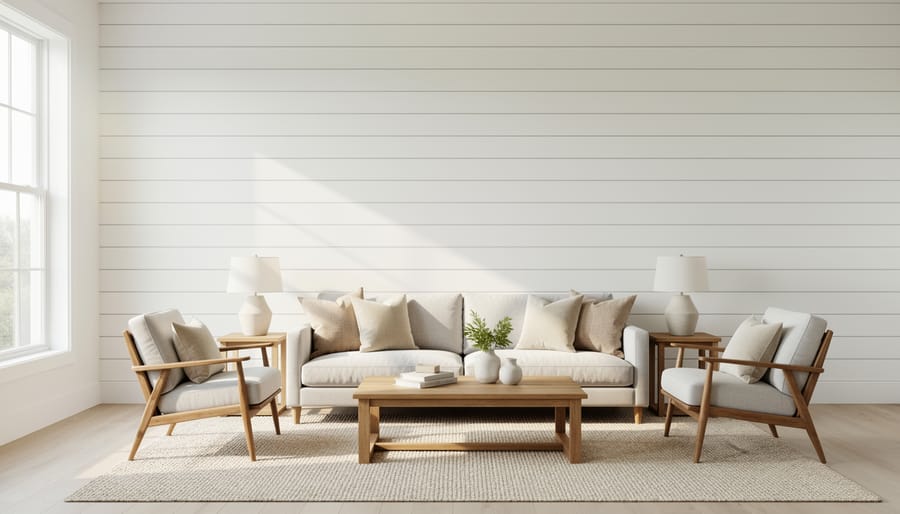
Horizontal shiplap paneling brings that signature farmhouse aesthetic without the fuss of more complex wood installations. These overlapping horizontal boards create subtle shadow lines that add dimension while keeping the overall look clean and approachable, perfect for bedrooms where you want warmth without visual chaos, or living rooms that need texture without competing with your furniture.
The painted-versus-stain decision hinges on your room’s personality. Crisp white shiplap brightens smaller bedrooms and bounces light around, making spaces feel larger. Natural stains in honey or walnut tones showcase the wood grain and deliver authentic rustic character, though they work best in rooms with ample natural light to prevent a cave-like feel.
Installation runs easier than you’d expect: boards attach directly to studs or over drywall with construction adhesive and finish nails. Start from the bottom, use nickel spacers between boards for consistent gaps, and level every few rows to catch drift before it becomes obvious. The technique hasn’t changed since shiplap’s 19th-century origins on barn exteriors, which explains its enduring popularity, it’s genuinely tried-and-tested design that translates beautifully indoors.
3. Vertical Wood Slat Walls
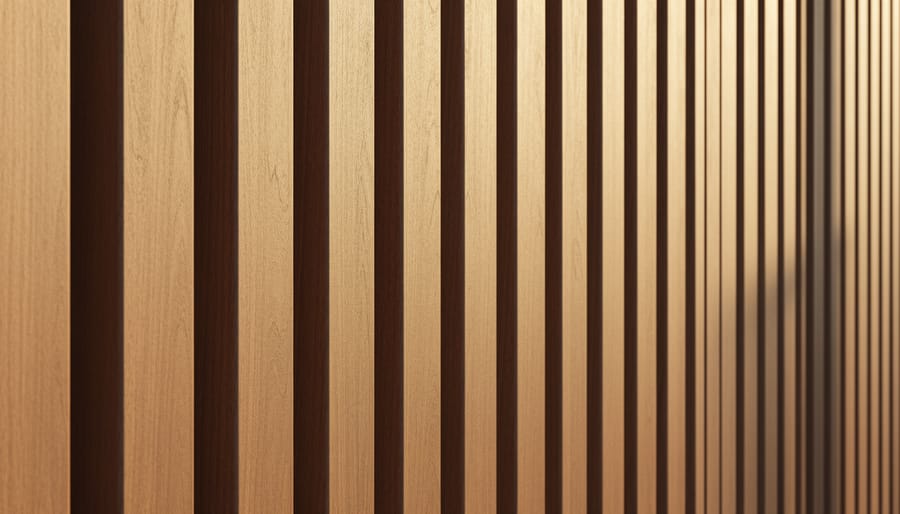
Vertical wood slat walls deliver a clean, architectural look that’s surged in popularity for 2026 interiors. The defining feature, evenly spaced wooden slats mounted against a backing wall, creates striking shadow lines that shift throughout the day as natural light changes angle. This depth effect makes rooms feel larger and more dynamic than flat paneling ever could.
Beyond aesthetics, the spacing between slats offers genuine acoustic benefits. The gaps absorb and diffuse sound waves rather than bouncing them back, reducing echo in high-ceiling dining rooms or minimizing video call reverberation in home offices. You’ll find slat walls particularly effective in open-concept spaces where controlling noise matters.
Installation requires precision measurement to maintain consistent spacing, typically 1 to 3 inches between slats, but the materials themselves are straightforward: furring strips, wood battens, and mounting adhesive or screws. For maximum impact, integrate LED strip lighting behind the slats. The backlit glow emphasizes the vertical lines and creates ambient illumination that’s both functional and sculptural. Oak and walnut work beautifully, though budget-conscious homeowners often choose pine or poplar with quality stain to achieve a similar effect at half the cost.
4. Geometric Wood Panel Patterns
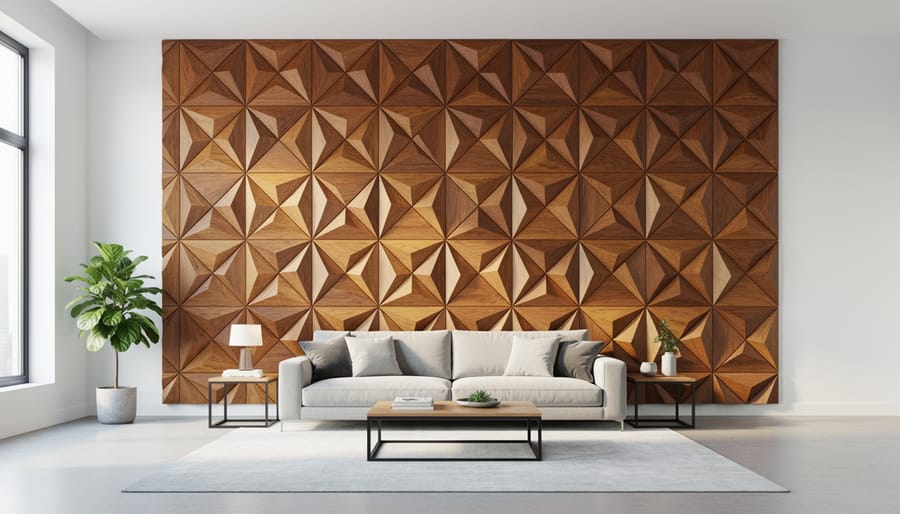
Geometric wood panel patterns transform a flat wall into architectural sculpture. Chevron and herringbone arrangements remain the most popular choices, with each plank angled to meet adjacent pieces, chevron forms crisp V-shapes while herringbone creates a staggered, woven appearance. Both demand precise cutting and careful planning since every angle must align perfectly; even minor miscalculations create visible gaps.
Oak and walnut work exceptionally well for these designs because their consistent grain and density allow clean miter cuts without splintering. Lighter woods like maple suit modern interiors, while darker species add drama to traditional spaces. For easier installation, consider hexagonal or diamond patterns using pre-cut panels rather than individual planks.
These designs shine as statement walls behind beds, in entryways, or framing fireplaces, locations where the pattern becomes a focal point rather than competing with furniture. Cost runs higher than straight plank installations due to material waste from angled cuts and increased labor time. Plan for 15-20% extra material to account for cutting angles and mistakes during layout.
5. Live-Edge Wood Features
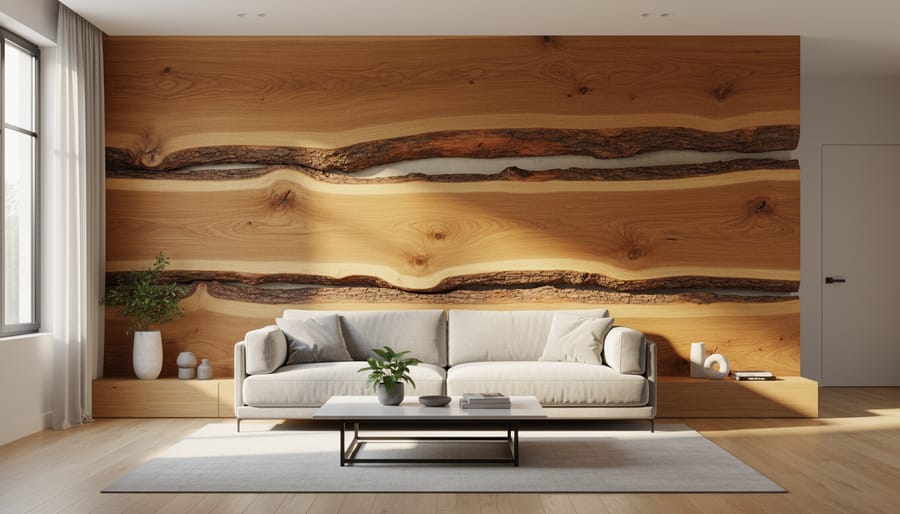
Live-edge wood features bring nature’s raw beauty indoors by showcasing planks with their original bark edges and irregular contours intact. These slabs, typically sourced from walnut, oak, maple, or cherry, create striking focal points that celebrate organic imperfection rather than hiding it.
Finding quality live-edge material requires visiting specialized lumber yards or working directly with sawmills that kiln-dry slabs to prevent warping. Expect to pay $15, $40 per board foot depending on species and figure, significantly more than milled lumber. Inspect for cracks, insect damage, and moisture content below 8% before purchasing.
Proper sealing is essential. Apply multiple coats of penetrating oil or polyurethane to both the wood surface and exposed edges, preventing moisture absorption and splitting. Some installers stabilize the bark edge with thin epoxy resin for durability.
Live-edge walls pair beautifully with minimalist interiors where the wood becomes sculptural art against clean white or concrete backgrounds. Install single statement pieces behind platform beds or create gallery-style arrangements with multiple slabs of varying widths. The natural irregularity provides warmth without overwhelming simple, uncluttered spaces.
6. Stained Wood Grid Walls
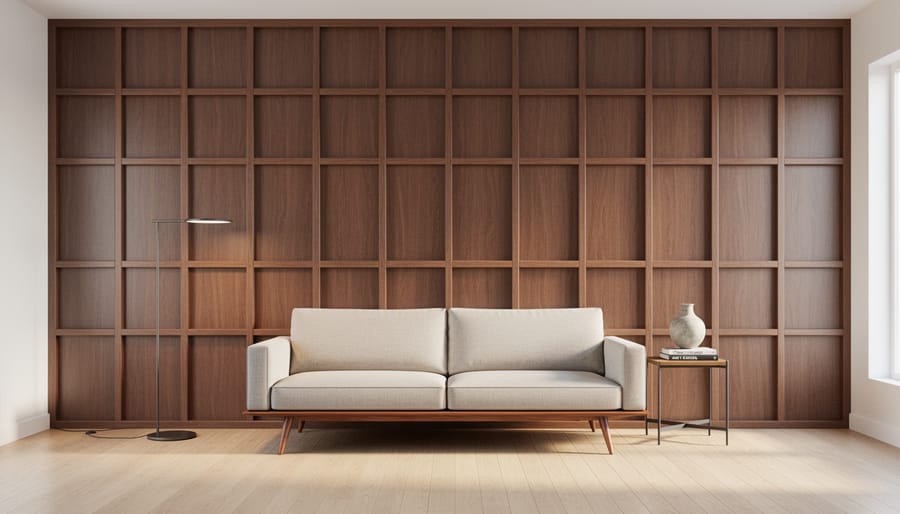
Stained wood grid walls deliver clean architectural lines through repeating square or rectangular frames, each filled with wood in varying stain tones. This design nods to mid-century modern sensibilities, think organized geometry rather than rustic texture. The controlled pattern creates visual rhythm without overwhelming a room.
Installation typically involves building a framework of thin wood strips (often poplar or pine) applied directly to drywall, then infilling each cell with contrasting stained panels. You might alternate walnut-tone squares with honey oak, or create an ombré effect from light maple to dark cherry across the grid. The frame strips themselves are usually painted in a neutral shade to let the stained wood take center stage.
These walls shine in dining rooms, home offices, and behind platform beds where their graphic quality acts as sophisticated artwork. The regular grid provides structure in open-plan spaces without requiring full room division. Plan your layout carefully before installation, uniform spacing matters here, and any misalignment becomes obvious. Use a level and measure twice, especially at corners where grids meet adjacent walls.
7. Whitewashed or Limewashed Wood
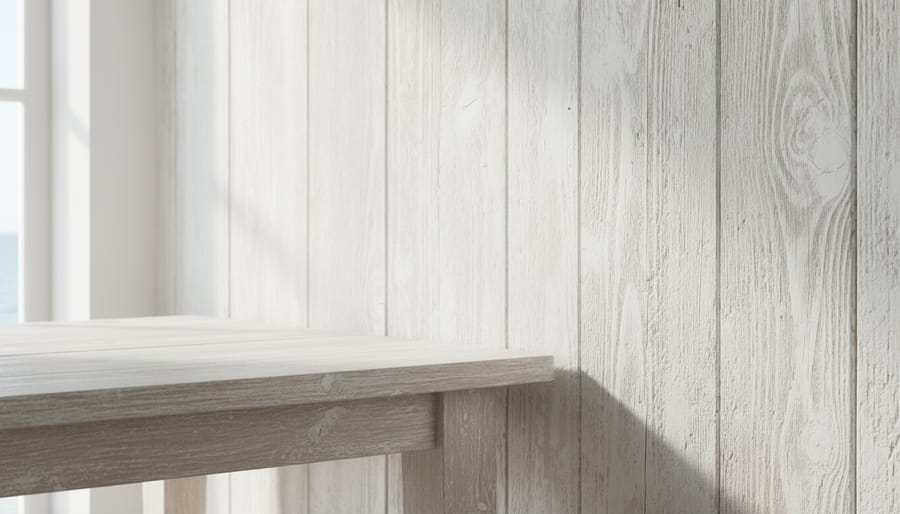
Whitewashing or limewashing transforms raw wood into a soft, luminous surface that evokes coastal cottages and Scandinavian interiors. This technique allows the natural grain to show through while bathing it in a milky, textured finish that feels both casual and refined.
Whitewashing involves diluting white paint with water (typically a 1:1 ratio) and applying it in thin coats, wiping away excess to control opacity. Limewashing uses slaked lime, which reacts with the wood to create a chalky, matte surface with subtle color variation. Pine, cedar, and oak respond particularly well to both methods, with open-grain woods accepting the finish most beautifully.
The finish works brilliantly in bedrooms where you want a serene backdrop, or in dining rooms seeking that effortless European farmhouse feel. Pair it with natural linen textiles and weathered metals for coastal charm, or combine it with clean lines and muted grays for Scandinavian minimalism.
Application takes patience rather than precision. Work in sections, maintain a wet edge, and embrace slight inconsistencies, they add character. The result softens without concealing, creating walls that feel airy and lived-in rather than polished.
8. 3D Textured Wood Tiles
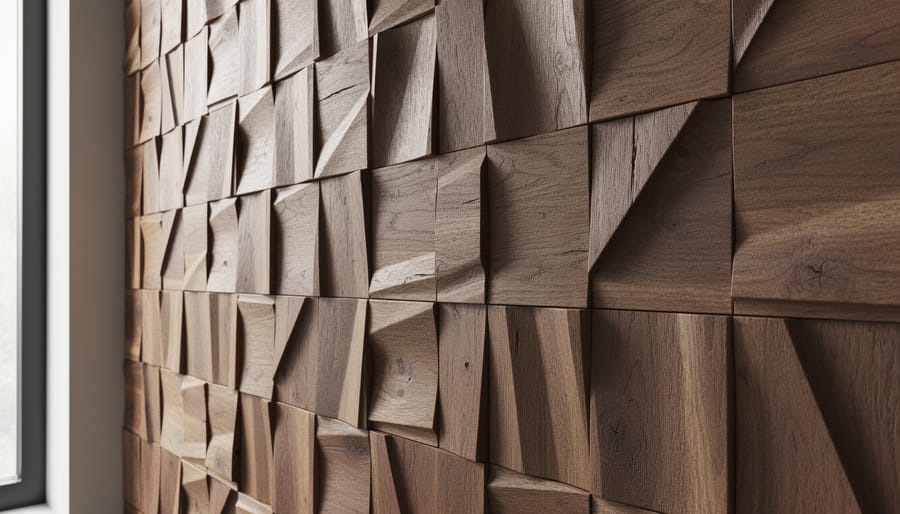
3D textured wood tiles transform flat walls into sculptural features through raised, recessed, or carved wooden blocks that catch and manipulate light throughout the day. Unlike standard paneling, these dimensional tiles create constantly shifting shadow patterns, deepening in afternoon light, softening at dusk, that add movement and interest to static spaces.
Design options range from subtle wave patterns and geometric relief to dramatic carved motifs resembling woven basketry or abstract topography. Most tiles measure 12 to 24 inches square and install via adhesive backing or mounting clips, making them easier to handle than full planks. Manufacturers offer everything from sustainably harvested teak with hand-carved details to budget-conscious pine with CNC-machined textures.
These tiles excel as focal points behind upholstered headboards or centered above living room sofas, where they draw the eye without overwhelming the space. The three-dimensional surface catches dust more readily than smooth walls, so plan for occasional vacuuming with a soft brush attachment. Sealed finishes repel moisture and simplify cleaning, though unfinished options allow later staining to match evolving décor. Position them where grazing light, whether natural or from wall sconces, accentuates their depth.
9. Mixed-Width Plank Walls
Mixed-width plank walls break the uniform grid pattern of standard shiplap or paneling, introducing an organic rhythm that feels hand-selected rather than mass-produced. By combining planks of varying widths, typically ranging from 3 to 8 inches, you create visual movement that draws the eye naturally across the surface without predictable repetition.
The key to successful layout lies in randomizing your pattern. Avoid placing narrow boards directly beside each other repeatedly, which creates unintended stripes. Instead, alternate widths intuitively, stepping back periodically during installation to assess balance. Some installers sketch layouts beforehand, but most find it more effective to dry-fit several rows and photograph them before committing.
Color variation amplifies the custom effect. Mixing boards from different batches or applying varied stain concentrations to individual planks produces subtle tonal shifts that mimic reclaimed wood collections. Even within a single species, natural grain differences become more pronounced when widths vary, eliminating the flat appearance of uniform planks.
This approach works particularly well in casual living spaces, mudrooms, and bedrooms where a relaxed, collected-over-time aesthetic enhances comfort rather than formality.
10. Dark-Stained Wood Paneling
Dark-stained wood paneling brings a level of sophistication and drama that lighter treatments simply can’t match. Deep walnut, espresso, or charcoal-stained planks create an enveloping, cocoon-like atmosphere that works beautifully in home libraries, studies, and primary bedrooms where you want a more intimate mood.
The key challenge with dark wood walls is preventing the space from feeling cramped or cave-like. Strategic lighting makes all the difference, install wall sconces, picture lights, or LED strips to create warmth and highlight the wood’s grain. Pairing dark panels with lighter furnishings, white trim, and generous natural light keeps the room from feeling heavy. A dark accent wall behind a white bed or flanking a fireplace offers dramatic impact without overwhelming the space.
This approach channels modern library aesthetics and works particularly well in larger rooms with high ceilings. Dark-stained panels also hide imperfections better than lighter finishes and require less frequent maintenance. The installation process mirrors other wood paneling projects, but choosing a quality stain with rich undertones, avoiding anything that reads flat black, ensures the grain remains visible and interesting.
11. Pallet Wood Accent Designs
Pallet wood offers one of the most budget-conscious routes to a textured accent wall, though it demands more preparation than purchased lumber. Reclaimed shipping pallets provide weathered character at minimal cost, often free from distribution centers or garden stores, but require careful vetting before installation.
The critical safety step involves identifying treatment markings. Look for “HT” (heat-treated) stamps rather than “MB” (methyl bromide), as the latter involves chemical fumigation unsuitable for indoor use. Avoid pallets with unknown origins or those that carried food, chemicals, or petroleum products. Once sourced, thoroughly clean each board, remove all nails, and sand rough edges to prevent splinters.
Pallet wood works beautifully in casual spaces like mudrooms, workshops, or recreation areas where its rustic imperfections enhance the aesthetic. The varied plank widths and natural color differences create organic visual interest without additional staining. Installation follows standard nailing or adhesive methods, though checking boards for warping beforehand saves frustration. For rooms requiring more polish, selective sanding and sealing can refine the look while preserving the repurposed character that makes pallet walls appealing.
12. Wood and Metal Combination Walls
Wood and metal combination walls bring an industrial edge that’s equally at home in urban lofts and suburban spaces looking for modern character. This design pairs the warmth of natural wood planks with the cool, architectural presence of metal framing, brackets, or trim to create visual contrast and textural interest.
The most common approach uses reclaimed or rough-sawn wood planks framed by blackened steel or brushed aluminum channels. Metal can outline entire sections, separate wood panels in a grid pattern, or accent corners and edges. This framework adds structure while the wood softens the overall effect, preventing the space from feeling too stark.
Material pairing works best when you match wood tones thoughtfully, warmer woods like oak or cedar balance black metal, while cooler grays complement stainless finishes. Consider the metal’s finish carefully: matte black delivers classic industrial appeal, while aged brass or copper introduces unexpected warmth.
Structural considerations matter here. Metal framing must attach securely to wall studs, and the combined weight of wood and metal requires proper anchoring. If you’re planning floor-to-ceiling coverage, consult a contractor to ensure your wall can handle the load and that the metal framework is level and square before installing wood elements.
13. Tongue-and-Groove Wood Ceilings Extended to Walls
Extending tongue-and-groove from ceiling to wall creates a seamless wooden envelope that transforms ordinary rooms into cozy retreats. This continuous treatment works beautifully in bedrooms, dens, and covered porches where you want maximum warmth and rustic character. Pine and cedar are popular choices for their workability and aromatic qualities, while lighter woods like maple prevent the space from feeling too dark.
Installation demands careful planning since the boards must transition smoothly where walls meet ceilings, requiring precise miter cuts at corners. You’ll also need to account for seasonal wood movement, both horizontal and vertical expansion can occur with humidity changes. Leave appropriate gaps at edges and use finishing trim that allows slight shifting without cracking. Pre-finishing boards before installation saves considerable effort, especially on ceilings.
This design shines in cabin and cottage settings where its enveloping effect enhances the away-from-it-all atmosphere. The labor-intensive installation typically requires professional help unless you’re experienced with woodworking, but the result is a distinctly warm sanctuary that feels custom-crafted. Budget $8-15 per square foot for materials and professional installation combined.
14. Floating Wood Shelf Walls
Floating wood shelf walls transform storage into sculptural art by arranging solid wooden shelves at varying heights and depths across a wall surface. Unlike traditional built-in units, these cantilevered shelves appear to hover without visible supports, creating clean lines and contemporary appeal. The staggered placement, some high, some low, some extending further from the wall, produces dynamic visual rhythm while providing genuine display and storage functionality.
Installation requires careful attention to load-bearing capacity. Each shelf needs robust hidden brackets or cleats anchored into wall studs, with weight limits varying by shelf thickness and bracket quality. Typical floating shelves handle 25 to 50 pounds when properly installed, but heavier items demand commercial-grade hardware or professional reinforcement.
The design excels in living rooms and home offices where you can showcase books, plants, pottery, or personal collections. Natural wood tones, walnut, oak, maple, bring warmth, while the negative space between shelves prevents visual clutter. Group shelves in asymmetrical clusters for modern drama, or align them in subtle horizontal bands for understated elegance. This approach merges functional beauty with architectural interest, proving storage solutions can double as standout design features.
15. Japanese-Inspired Wood Screen Walls
Japanese-inspired wood screen walls bring an element of refined tranquility through intricate kumiko lattice patterns that transform functional dividers into architectural art. These delicate geometric designs, traditionally crafted without nails or glue using precise joinery, filter light beautifully while maintaining visual connection between spaces, making them ideal for creating subtle room separation in open-plan homes or meditation areas.
The patterns range from simple asanoha (hemp leaf) designs to complex arrangements requiring master craftsmanship. While authentic kumiko demands specialized skills, contemporary versions using pre-made panels or routed patterns offer more accessible installation. These screens work exceptionally well as partial walls between living and dining areas, bedroom dividers, or even as decorative panels flanking windows.
Consider the cultural significance when incorporating these designs. Authentic approaches use light woods like cedar or cypress with natural finishes that honor Japanese aesthetics, avoiding heavy stains that contradict the style’s emphasis on material honesty. The openwork construction provides privacy without isolation, softens harsh sunlight, and creates ever-changing shadow patterns throughout the day. Pair with minimal furnishings and neutral palettes to preserve the zen-like atmosphere these screens naturally cultivate.
Choosing the Right Wood Wall Design for Your Space
Selecting the right wood wall treatment starts with your room’s purpose and conditions. High-moisture areas like bathrooms and kitchens demand sealed or naturally water-resistant species such as teak or cedar, while bedrooms and living rooms accommodate nearly any design. Consider your existing décor palette, whitewashed or limewashed finishes complement coastal and Scandinavian schemes, while dark-stained panels suit moody, contemporary spaces. Geometric patterns and vertical slats lean modern, whereas reclaimed barn wood and shiplap offer farmhouse warmth.
Budget plays a decisive role. Pallet wood and painted shiplap offer affordable entry points for DIY enthusiasts, typically under $3 per square foot for materials. Live-edge planks, 3D textured tiles, and custom geometric designs can exceed $15 per square foot and often require professional installation. Assess your skill level honestly, horizontal shiplap and mixed-width planks suit confident DIYers with basic carpentry tools, while intricate kumiko screens and ceiling-to-wall tongue-and-groove installations benefit from contractor expertise to ensure proper alignment and expansion management.
For contractor projects, obtain three detailed quotes, verify licensing, and request photos of completed wood wall installations. DIY approaches save labor costs but demand time, precision, and appropriate tools like miter saws and nail guns. Start with a single accent wall to test your abilities before committing to larger installations, and prioritize designs that forgive minor imperfections if you’re learning as you go.
Common Questions About Wood Wall Designs
Wood walls transform spaces beautifully, but homeowners naturally have practical concerns before committing to these designs. Here are answers to the most common questions we encounter.
How do you maintain wood walls?
Dust wood walls regularly with a soft cloth or vacuum brush attachment, and clean with a lightly dampened microfiber cloth when needed. Most sealed wood walls require minimal upkeep beyond occasional dusting, though unsealed or live-edge options may need periodic re-oiling or sealing every few years depending on humidity and wear.
Are wood walls more expensive than drywall or paint?
Wood wall treatments typically cost more upfront than standard drywall and paint, ranging from budget-friendly pallet wood at $3-5 per square foot to premium reclaimed barn wood at $15-25 per square foot. However, they often eliminate the need for artwork or additional décor, and quality installations can last decades without needing replacement.
Can wood walls handle moisture in bathrooms or basements?
Wood walls can work in higher-moisture areas if you choose moisture-resistant species like cedar or teak and apply proper sealants. Ensure adequate ventilation, maintain consistent humidity levels, and avoid direct water contact to prevent warping, mold, or rot in these environments.
Can you paint or refinish wood walls later?
Yes, most wood walls can be painted, stained, or refinished, though the ease depends on the original finish and wood type. Sand lightly before applying new stain or paint, and remember that painting over natural wood is reversible with stripping, though labor-intensive.
Do wood walls add value to your home? Quality wood wall installations generally enhance home value by adding character and perceived craftsmanship, particularly in markets where natural materials and unique design features appeal to buyers. The value boost depends on execution quality and whether the style aligns with your home’s overall aesthetic rather than feeling like an isolated trend.
