
17 Fairy Lights Bedroom Ideas to Transform Your Space into a Magical Retreat
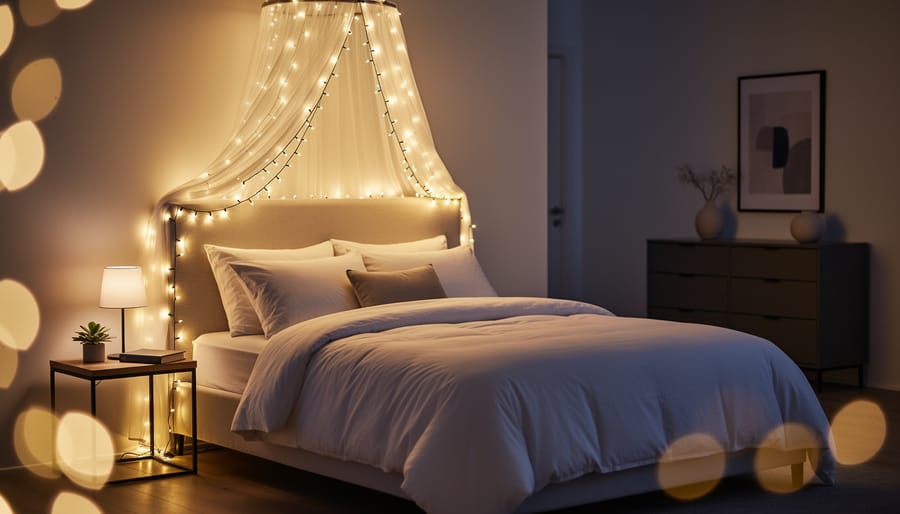
Fairy lights transform a bedroom from functional space to personal sanctuary in under an hour, and the best approach combines ambient lighting with strategic placement that complements your existing décor. Whether you’re threading them along a headboard, draping them across a canopy, or weaving them through shelving, the right technique balances visual impact with safety and practicality.
The appeal is straightforward: fairy lights offer customizable, low-cost mood lighting that adapts to any bedroom style. Over the past decade, LED technology has made them safer, more energy-efficient, and far more versatile than the incandescent strings our parents used for holiday decorations. Today’s options include battery-powered designs for cord-free installations, dimmable sets for adjustable ambiance, and smart-enabled strings that sync with your sleep schedule.
But inspiration is only half the equation. You also need to know which lights work best for your space, how to install them without damaging walls or creating fire hazards, and which placements deliver the most visual impact for the effort involved. Getting it wrong means tangled cords, harsh lighting that disrupts sleep, or adhesive damage when you move.
This guide walks through 17 tested fairy lights decoration ideas specifically for bedrooms, ranging from simple five-minute setups to weekend projects that create statement features. Each idea includes practical placement details, recommended light types, and real-world considerations like outlet access and mounting methods. You’ll also find selection criteria to match lights to your bedroom’s size and style, plus safety guidelines drawn from current electrical standards for 2026.
The goal is simple: give you enough concrete options that at least three will work in your space right now, with the confidence to install them properly.
Why Fairy Lights Work So Well in Bedrooms
Bedrooms demand lighting that soothes rather than stimulates, and fairy lights deliver exactly that. Their low-intensity glow creates ambient warmth without the harshness of overhead fixtures, making them ideal for winding down before sleep. Unlike bright ceiling lights, fairy lights produce soft, diffused illumination that helps signal to your body it’s time to rest, a crucial consideration when research shows that light at night disrupts sleep patterns.
The practical advantages extend beyond aesthetics. Modern LED fairy lights consume minimal electricity, typically just 4 to 6 watts per strand, and because LEDs save energy compared to traditional bulbs, you can leave them on for hours without guilt. Most quality sets cost between $15 and $40, making them one of the most affordable ways to transform a space. They work equally well in compact studio apartments and sprawling master suites, and they complement everything from industrial lofts to cottage-style retreats. You’re not locked into a single look, drape them loosely for bohemian vibes or arrange them geometrically for modern minimalism.
How to Choose the Right Fairy Lights for Your Bedroom
The right fairy lights can make or break your bedroom transformation. Before you buy, you need to match the lights to your space, lifestyle, and aesthetic goals.
Start with color temperature. The warm vs cool white decision shapes your entire ambiance. Warm white (2700-3000K) creates a cozy, inviting glow perfect for relaxation and sleep, while cool white (5000-6500K) delivers a brighter, more energizing light better suited for task areas. Most bedroom installations benefit from warm white, which mimics traditional incandescent bulbs and promotes melatonin production.
Power source matters more than you’d think. The plug-in vs battery debate comes down to placement flexibility and maintenance. Plug-in options provide consistent brightness without battery changes but require proximity to outlets. Battery-powered strands offer installation freedom and work well for renters, though they dim as batteries drain. USB-powered lights split the difference, ideal for bedside or desk setups. Solar options remain impractical for indoor bedroom use in 2026.
Wire color affects daytime appearance significantly. Copper wire blends beautifully with warm decor and becomes nearly invisible against wood tones. Silver wire suits modern, cool-toned spaces. Green wire works for outdoor-inspired or botanical themes but rarely looks intentional indoors.
Before purchasing, consider these essentials:
- Power source that matches your outlet access and maintenance preference
- Total length needed for your planned placement (measure twice, buy once)
- Light density measured in LEDs per foot for your desired brightness level
- Color temperature appropriate for sleep and relaxation
- UL or ETL safety certification for 2026 electrical standards
Light density ranges from sparse (20-30 LEDs per strand) to dense (200+ LEDs). Sparse strands create subtle accent lighting, while dense options deliver serious illumination. For ambient bedroom lighting, aim for 100-150 LEDs per 10-foot strand.
Smart features add convenience without significant cost increases. Dimmable lights let you adjust brightness for different activities. Timer functions automate on/off schedules, extending bulb life and cutting energy use. App-controlled options integrate with voice assistants, though simple plug-in timers work just as well for most users.
17 Inspiring Fairy Lights Bedroom Ideas
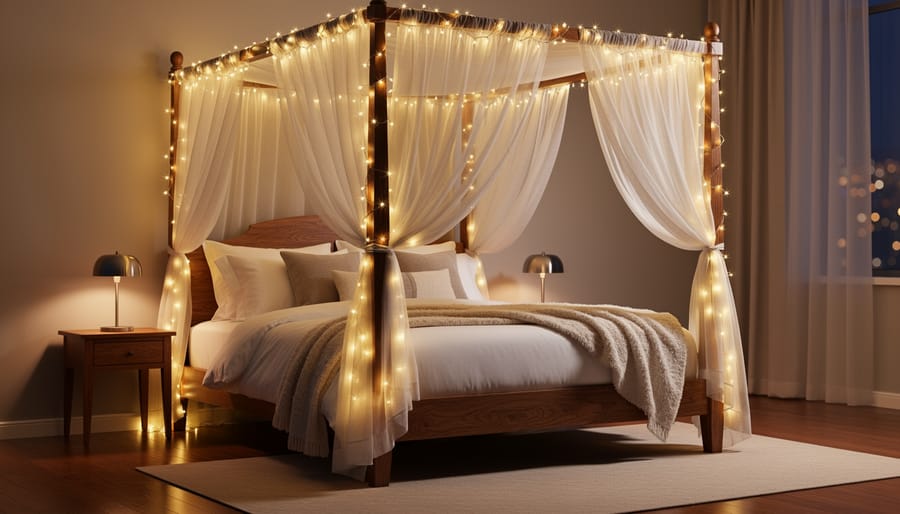
1. Canopy Bed Draping
Canopy bed draping creates an instant focal point that turns an ordinary bedroom into a romantic retreat. Start by securing the light strand at one corner post using clear adhesive hooks or twist ties, then drape it loosely across to the opposite corner, allowing gentle swags between posts. Continue this pattern around all four posts, adjusting the depth of each drape to create consistent, symmetrical curves. For the best effect, use warm white lights spaced closely together and avoid pulling the strand too tight, which creates harsh lines rather than the flowing, ethereal look you’re after. If your canopy fabric is sheer, position lights on top of the frame for a soft, diffused glow through the material.
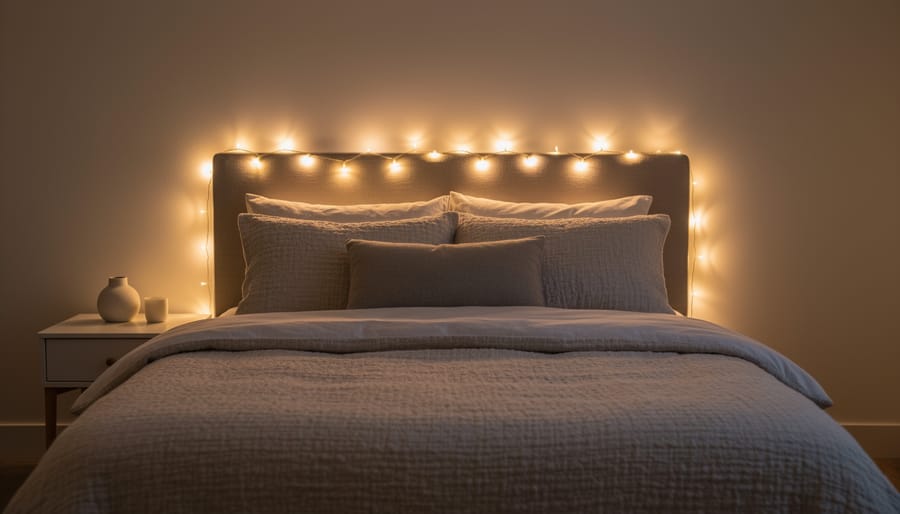
2. Headboard Backlighting
String fairy lights vertically or horizontally behind your headboard to create a soft halo effect that makes the bed appear to float. This technique works brilliantly with upholstered headboards, where you can tuck the strand between the wall and fabric, or with slatted wooden designs that naturally conceal the wiring while allowing light to peek through gaps.
For best results, use warm white lights and position the strand about two inches from the wall’s surface. Secure it with removable adhesive clips rather than nails to avoid damaging walls. The indirect lighting eliminates harsh shadows, making this ideal for late-night reading or creating a relaxing pre-sleep atmosphere without overhead fixtures.
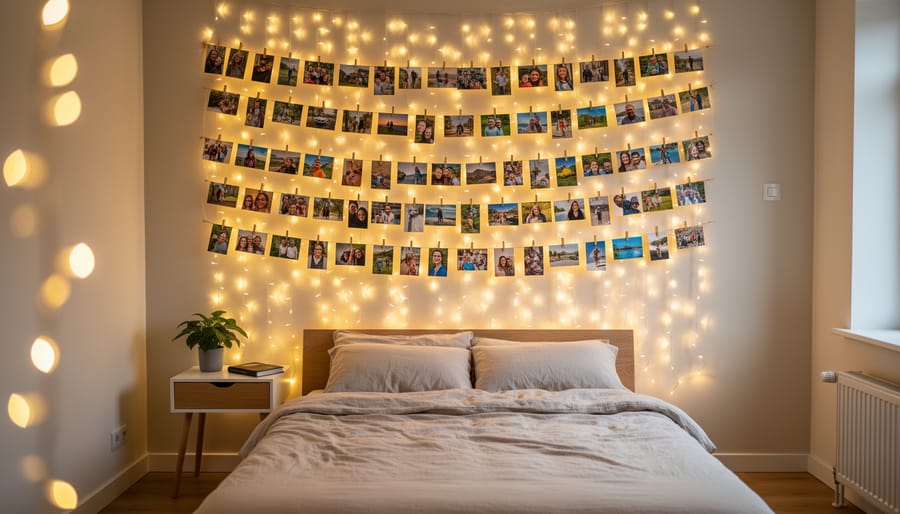
3. Photo Wall Display
Transform your favorite memories into an illuminated display by clipping photographs or polaroids directly onto fairy light strands. This approach works beautifully for renters since it eliminates the need for frames or permanent wall fixtures.
Use mini wooden clothespins or clear plastic clips spaced along the light strand, ensuring each photo receives gentle backlighting without covering the bulbs completely. Battery-operated or USB-powered lights work best for this setup, giving you flexibility in placement without hunting for outlets. Position the strand horizontally across one wall or create a cascading vertical arrangement from ceiling to floor.
The soft glow makes this display equally attractive during day and night, and you can rotate photos seasonally or as your collection grows, keeping your space fresh without additional investment.
4. Ceiling Star Effect
Transforming your ceiling into a night sky creates an enchanting overhead canopy that mimics sleeping under the stars. This works particularly well in rooms with plain ceilings that need visual interest.
For permanent installations, use adhesive ceiling hooks spaced 12-18 inches apart in an irregular pattern, randomness looks more natural than strict grids. Drape lights loosely between hooks, creating swooping curves rather than taut lines. Battery-powered or plug-in options with remote controls let you adjust brightness from bed.
Popcorn or textured ceilings require self-adhesive hooks with stronger backing; test one hook for 24 hours before installing the full set. For rental-friendly alternatives, try fishing line to suspend lights from existing fixtures, or concentrate lights in one corner for a constellation effect rather than full coverage. Warm white bulbs (2700K) enhance the starlight illusion better than cool whites.
5. Window Frame Outlining
Window frame outlining transforms a functional architectural element into a luminous focal point. Run fairy lights along the interior trim of your window, securing them with small adhesive hooks or clear command strips that won’t damage paint. This placement creates soft perimeter lighting that highlights the window’s shape while casting a gentle glow into the room.
The daytime aesthetic matters here. Choose wire colors that complement your trim, copper or gold wires add warmth to wooden frames, while silver or white wires disappear against painted trim. During daylight hours, the unlit strands should enhance rather than distract from your window treatment.
This idea offers exceptional seasonal versatility. The same light strand works for everyday ambiance, then transitions effortlessly into holiday décor with minimal adjustment. For renters, this approach leaves no permanent marks when you remove the adhesive hooks.
6. Mirror Surround
Framing your mirror with fairy lights instantly creates that coveted Hollywood dressing room vibe while solving the common problem of inadequate makeup or grooming lighting. The warm, even illumination eliminates harsh shadows that overhead fixtures often cast on your face.
For vanity mirrors, run a single strand around the entire perimeter, securing it with small adhesive clips every few inches. Keep the lights close to the mirror’s edge rather than drooping away from the frame. Battery-operated micro-LEDs work beautifully here since you won’t see trailing cords, and many now come with dimmer switches so you can adjust brightness for different tasks.
This idea works equally well with full-length mirrors or smaller wall-mounted ones. If your mirror has a thick frame, tuck the lights into the groove between frame and glass for a cleaner look. The functional benefit here is genuine: soft, diffused lighting from multiple angles reveals true colors better than a single harsh bulb overhead.
7. Mason Jar or Glass Vessel Clusters
Coiling battery-operated fairy lights inside mason jars, vintage bottles, or clear glass vases creates charming bedside lighting that’s completely portable. This approach works beautifully on nightstands, dressers, or window sills where you want soft, contained illumination without drilling holes or running cords.
Choose containers with wide openings for easy light placement and battery access. Clear glass works for maximum brightness, while frosted or tinted vessels create more diffused effects. Cluster three to five jars of varying heights for visual interest, or use a single large vessel as a statement piece.
Safety note: only use battery-operated lights inside enclosed containers. Plug-in lights generate heat that glass can trap dangerously. Ensure batteries stay accessible for replacement, and avoid sealing jars completely, which restricts airflow and accelerates battery drain.
8. Floating Shelf Accent
Floating shelves become gallery-worthy displays when you weave fairy lights along their length. Drape a single strand behind your books and decor objects, letting the wire peek out just enough to create a warm backlight effect. The lights draw attention to your curated items while providing gentle task lighting for nighttime browsing.
For the cleanest look, match your wire color to the shelf finish, copper wire on wood tones, silver on white shelves. Battery-operated micro LEDs work best here since you won’t need visible cords running down the wall. Space your shelves at least twelve inches apart to prevent the lighting from feeling cluttered, and focus on three to five key objects per shelf rather than overcrowding the arrangement.
9. Bed Frame Under-Lighting
Platform beds and bed frames with clearance underneath become architectural statements when you add fairy lights along their base. This floating effect creates the illusion that your bed hovers above the floor, while providing just enough glow for safe nighttime movement without disrupting sleep.
Choose waterproof-rated LED strips or low-profile fairy lights that can tolerate dust accumulation. Attach them to the bed frame’s underside using adhesive clips, running the strand along all four sides for even distribution. Battery-operated options eliminate the need for visible cords, though plug-in versions with flat cables work well if an outlet sits near the bed’s head.
This setup works particularly well in modern and minimalist bedrooms where the lighting becomes a subtle design feature rather than decoration. Position lights toward the frame’s center rather than the outer edge to prevent direct glare when you’re lying in bed.
10. Wall Art Integration
Fairy lights transform into artistic statements when woven through macramé wall hangings, dreamcatchers, or textile art pieces. Battery-operated micro LEDs work best for this application since they’re lightweight and won’t pull down delicate materials. Create your own light-based wall art by arranging lights in abstract shapes around canvas frames or behind laser-cut wooden panels for dimensional shadow effects.
This approach suits bohemian and eclectic bedrooms particularly well, turning functional lighting into a focal point that doubles as daytime décor. For renters, this method offers maximum impact without permanent wall fixtures, simply hang your illuminated artwork with removable hooks. Layer multiple pieces at varying heights to build visual interest and create a gallery wall effect that glows softly after dark.
11. Reading Nook Enhancement
A dedicated reading nook becomes instantly more inviting when you string fairy lights along the surrounding walls or drape them overhead. Position lights to frame a comfortable chair or window seat, creating a defined boundary that separates your reading space from the rest of the bedroom. For alcoves, run a single strand along the perimeter at eye level or slightly above to cast gentle, eye-friendly illumination without glare on your pages.
Battery-operated lights work perfectly here since reading nooks often sit away from outlets. Choose warm white bulbs to reduce eye strain during extended reading sessions, and consider adding a dimmer if you’re using plug-in lights, you’ll want brighter light for reading and softer ambiance when you’re just relaxing.
12. Closet or Wardrobe Lighting
Battery-operated fairy lights transform closets from purely functional spaces into softly illuminated design features. Drape a single strand along the top rod of an open wardrobe or weave lights through clothing racks to create a boutique-style dressing experience. For walk-in closets, outline shelving units or mirror frames with warm white lights that make outfit selection easier while adding ambiance.
Battery power eliminates the need for nearby outlets and keeps cords safely away from hanging clothes. Choose lights with an on/off switch positioned near the closet entrance for convenience. Motion-sensor battery packs offer hands-free operation, lights activate when you open the door and shut off automatically after a set time, conserving battery life while providing practical illumination exactly when needed.
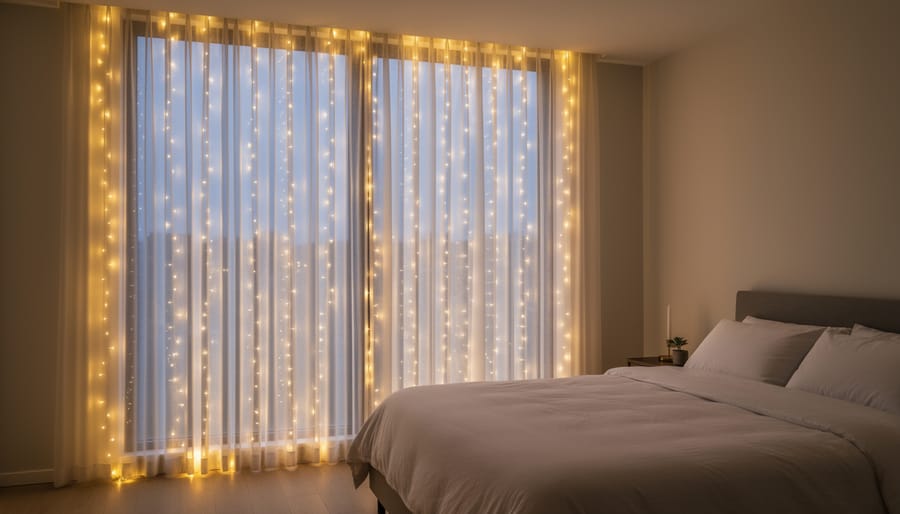
13. Sheer Curtain Layering
Positioning fairy lights between your window and sheer curtains transforms harsh direct light into a soft, dreamlike wash across your bedroom walls. The translucent fabric acts as a natural diffuser, scattering the pinpoints into a gentle, continuous glow that adds remarkable depth to the space.
This technique works best with white or cream sheer curtains and warm white lights. Attach a strand along the curtain rod or window frame, then hang your sheers in front. The layered effect creates visual interest even during daytime, as the hidden lights cast subtle shadows through the fabric. For optimal results, use lights with at least 6-inch spacing between bulbs to prevent obvious hot spots. Battery-operated strands eliminate visible cords, maintaining the ethereal aesthetic while keeping installation renter-friendly.
14. Geometric Wall Patterns
Create intentional shapes like hearts, initials, or geometric zigzags with fairy lights to transform a blank wall into a personalized statement piece. This approach works particularly well in teen bedrooms or rental spaces where you want impact without permanent fixtures.
Use small adhesive hooks or removable mounting tape to outline your desired shape on the wall before stringing the lights. Plan your pattern with a pencil first to ensure symmetry and proper spacing. Words like “DREAM” or simple symbols offer strong visual impact without requiring artistic skill.
Battery-powered micro LED strands work best for this application since they’re lightweight and easier to manipulate into tight corners and curves. Space your mounting points every four to six inches for clean lines that hold their shape without drooping between supports.
15. Plant Shelf Illumination
Weaving fairy lights through your indoor plant collection transforms a simple shelf into an illuminated botanical display that brings life to your bedroom at any hour. The warm glow accentuates the textures and shapes of leaves while creating depth and visual interest in otherwise flat arrangements.
Choose battery-operated or low-heat LED lights to prevent any heat damage to foliage. Position the strand behind or between plants rather than directly touching leaves, which allows the light to backlight the greenery for a dramatic silhouette effect. Secure lights along the back edge of shelving or wind them loosely around pots and risers.
Keep the light color warm white rather than cool white to complement the natural green tones and maintain a cozy bedroom atmosphere. Avoid leaving lights on continuously if they’re positioned near light-sensitive plants, timers work perfectly here. This approach works especially well in bedrooms with limited natural light, as the fairy lights draw attention to your greenery without interfering with plant care routines.
16. Minimalist Single-Strand Drape
A single strand of fairy lights draped horizontally across a feature wall or loosely arranged around one meaningful element proves that restraint creates impact. This approach works exceptionally well in contemporary bedrooms where excessive decoration would clash with clean lines and intentional negative space.
Secure one end near the ceiling corner, let the strand drop in a gentle curve, then anchor it at the opposite corner or midpoint. The natural drape creates visual interest without competing with furniture or artwork. Choose lights with minimal wire visibility, copper or white strands on matching walls, to maintain the streamlined aesthetic. This setup takes under five minutes to install yet instantly softens stark walls while preserving the room’s breathing space.
17. Pergola or Room Divider Accent
Studio apartments and shared bedrooms benefit enormously from visual zone separation, and fairy lights wrapped around room dividers or overhead structures create defined spaces without blocking light or airflow. Drape strands along the top edge of folding screens, bookshelf dividers, or freestanding partitions to mark sleeping areas distinct from work or living zones. For rooms with exposed beams or if you’ve installed a decorative pergola frame above the bed, wrap lights around the horizontal supports to create an intimate canopy effect that signals a dedicated rest area. This approach works particularly well in loft-style bedrooms where architectural elements already suggest natural divisions. Battery-operated strands offer the most flexibility since dividers rarely sit near outlets, and warm white lights maintain a cohesive feel across both zones rather than creating harsh visual boundaries.
Installation and Safety Tips
Installing fairy lights shouldn’t require professional help, but a few smart precautions will keep your bedroom both beautiful and safe. Here’s what you need to know before hanging your first strand.
Start by checking your electrical setup. Most fairy light strands draw minimal power, but plugging multiple sets into a single outlet or power strip can overload circuits. Limit yourself to two or three strands per outlet, and always check the wattage rating on both the lights and your power source. If you’re using an extension cord, choose one rated for indoor use with sufficient amperage for your total load.
For renters and anyone avoiding wall damage, adhesive hooks designed for temporary use work wonderfully. Look for removable command strips rated for your lights’ weight, or try barely-visible thumbtacks for lightweight strands on painted walls. Tension rods across window frames or inside alcoves provide damage-free mounting points, while clips that slide over headboards or shelving eliminate the need for adhesives entirely.
Heat management matters more than many realize. LED fairy lights run cool, but older incandescent versions can get surprisingly hot. Keep any lights at least six inches away from curtains, bedding, and paper decorations. Avoid coiling excess wire tightly, which can trap heat and degrade insulation over time.
Timers are your best friend for both safety and convenience. Basic plug-in timers cost under $10 and automatically shut off your lights after a set period, preventing all-night energy waste and reducing fire risk. In 2026, smart plugs take this further by letting you control lights from your phone, set custom schedules, and even adjust brightness on compatible LED strands.
When you’re not using your lights, store them properly to extend their lifespan. Wrap strands loosely around cardboard or store them in a container that prevents tangling and wire stress. Keep them in a cool, dry place away from direct sunlight, which can degrade plastic insulation. Check connections and wiring before each installation, and replace any strands with frayed wires or cracked sockets immediately.
Styling Fairy Lights for Different Bedroom Aesthetics
Your bedroom aesthetic determines how fairy lights should be styled and placed. Matching the right approach to your existing decor creates cohesion rather than clutter.
- Modern minimalist: Choose thin copper wire lights in cool white, arranged in single geometric lines or simple overhead drapes. Less is more, one or two strands maximum.
- Bohemian: Layer multiple strands at varying heights, mix warm white with amber tones, and combine with macramé, plants, and textiles for abundant visual interest.
- Romantic traditional: Soft draping around canopy beds or headboards works best with warm white lights on delicate silver wire. Focus on curves rather than straight lines.
- Industrial: Edison-style bulb strings with visible black wiring complement exposed brick and metal fixtures. Larger bulb spacing creates intentional negative space.
- Scandinavian: Simple white lights on nearly invisible wire, paired with natural wood and minimal placement. Think single strand along a shelf or window frame.
The key is restraint. Even bohemian styles benefit from intentional placement rather than random tangling. Start with your room’s dominant materials and colors, then select light temperature and wire finish accordingly. Warm brass wire suits traditional and boho spaces, while copper or silver works for modern and Scandinavian rooms. Black wire naturally disappears in industrial settings but can look harsh against light walls.
Remember to follow fairy lights safety tips regardless of aesthetic choice. A beautiful installation means nothing if it creates fire hazards or damages your walls. Test your chosen style in daylight first, some placements that glow beautifully at night look messy or distracting during the day.
Common Fairy Lights Questions Answered
Can you leave fairy lights on all night?
LED fairy lights generate minimal heat and are generally safe to leave on overnight, but it’s best practice to use a timer or turn them off when sleeping to extend their lifespan and reduce energy consumption. Always check that your specific lights have proper safety certifications and avoid leaving battery-operated models unattended for extended periods.
How do you hide fairy light wires?
Run wires along baseboards, behind furniture, or inside cable management channels for a cleaner look. For wall installations, use small clear adhesive hooks or clips that match your wall color, or tuck wires behind curtains, headboards, and picture frames.
What’s the lifespan of LED fairy lights?
Quality LED fairy lights typically last between 25,000 to 50,000 hours of use, which translates to several years of nightly operation. The actual lifespan depends on usage patterns, power source quality, and how well you store them when not in use.
Are fairy lights safe for children’s rooms?
Yes, LED fairy lights are safe for children’s rooms because they stay cool to the touch and pose minimal fire risk. Keep lights out of reach of very young children, secure all wires properly, and choose battery-operated options to eliminate cord hazards near cribs or play areas.
How much do fairy lights cost to run?
LED fairy lights are remarkably inexpensive to operate, typically costing less than a dollar per month even with nightly use. A standard 100-light LED strand uses around 4-5 watts, making them one of the most energy-efficient decorative lighting options available in 2026.
Can fairy lights be dimmed?
Many modern fairy lights come with built-in dimming functions or multiple brightness settings, while others work with smart plugs that offer dimming control through apps. Check product specifications before purchasing if dimming is important to you, as not all models support this feature.
Beyond these common questions, remember that maintenance is straightforward. Dust your lights occasionally with a dry cloth, store them properly wrapped around cardboard to prevent tangling, and replace any strands with damaged wires immediately rather than attempting repairs. If lights flicker or certain bulbs stop working, the issue is often a loose connection at the power source or a single faulty bulb affecting the circuit. Most quality strands continue working even if one bulb fails, but checking connections first usually solves most problems.
Quick Recap: Creating Your Fairy Light Bedroom
Transforming your bedroom with fairy lights doesn’t require a big budget or advanced DIY skills. These 17 ideas prove that a few well-placed strands can create the cozy, magical atmosphere you’re after, whether you prefer minimalist elegance or abundant bohemian layers.
Start by choosing lights that match your needs: warm white for relaxation, the right power source for your setup, and proper length for your space. Pick one simple idea that appeals to you, maybe headboard backlighting or a photo wall display, and see how it changes the room’s feel. Once you’re comfortable, layer in additional placements or experiment with different zones.
Safety always comes first. Use certified products, avoid overloading outlets, and learn to hide fairy light wires cleanly for a polished look. Keep lights away from fabrics and flammable materials, and consider timers to extend bulb life while saving energy.
At A Trendy Home, we’ve spent nearly a century helping homeowners blend timeless design principles with current trends. Fairy lights perfectly embody that philosophy: a simple, affordable touch that creates genuine warmth and personality in any bedroom.
